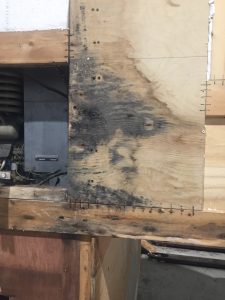
The camper sat outside for several years while I worked through some Medical problems. The weather was not kind to the camper and it got water in around the seams and any small openings. It didn’t help that it endured -40 degree temperatures as well.
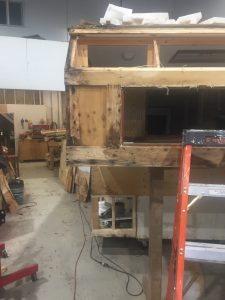
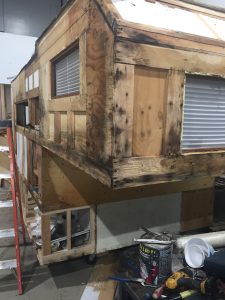
I finally got a way to move the camper into a closed and heated shop and got a chance to take off most of the outer siding. I started by taking off the siding on the front of the camper and was quite startled by what I found. I found a lot of water damage and decided since I was now a retired old man that I would rebuild it and make it better. So I started removing all of the water damaged framing and siding.
It was not a very happy job and I spent a lot of time and money on this seemingly overwhelming project.


Since the water damage was so extensive I had to take all of the framing off and replace it. It was an exercise in demolition, engineering and redesign. As for the redesign part I decided to add on to the total configuration of the camper. I decided that I would add more storage space on the passengers side of the camper, more storage on the Drivers side of the camper, and a bathroom and shower at the back of the camper.
The camper went from a base of 8 feet long by 4 feet wide to fit in a regular pickup truck to a base of 8 feet by 8 feet to fit on a larger truck because now it would be heavier, with a deck.
The complete front had to be replaced and new window put in the front. I also had to replace pretty much all of the inside and outside sheeting on the passengers side of the camper. I also resized the side window and moved the furnace and the cooktop to make room for the bathroom and shower. In the process I also relocated the fresh water tank and made extra drawers for storage and a new compartment for batteries for a solar system. Because I created new storage in the bottom of the camper I also moved the propane tank to the new lower level.
So now I have a new rebuilt sleeping area and a new smaller sitting area. After all this is really a camper for 1 person or 2 really friendly people.
After replacing all of the framing on the front and on one side, I replaced all of the cupboards I had to remove and all of the interior paneling. I was unable to get the same panelling that I had used originally so I used 3/16 inch knotty pine boards instead. I is light, takes a clear coat and is relatively cheap. It is also easy to apply when you have an air powered stapler. On the outside I used 1/4 inch plywood for exterior sheeting. It was attached using #8 countersunk wood screws. I put the siding back on the camper and put all of the windows back in and am putting on new trim, and finishing the shower area.
I also had to replace all of the water damaged insulation.
